Blender: Cleaning Up 3D Scans
Student reference guide · Blender 5.x · New Media
This guide is designed for students opening Blender for the first time, particularly those bringing in 3D objects scanned with a phone using Polycam or similar applications.
The goal is not to learn all of Blender. It is to learn enough to import, inspect, clean, simplify, and export a 3D mesh for use in Unity.
The basic workflow is:
Import
Inspect
Clean
Simplify
Export
1. Understanding the Blender interface
|
Interface element |
What it does |
|---|---|
|
3D Viewport |
Main area where you view and edit 3D objects |
|
Outliner |
Upper-right list of objects in the scene |
|
Properties Editor |
Lower-right panel containing object settings and modifiers |
|
Toolbar |
Left side of the Viewport; selection, move, rotate, scale |
|
Viewport Header |
Mode selection, view settings, and mesh editing menus |
|
Sidebar |
Press |
|
Workspace Tabs |
Across the top: Layout, Modeling, Sculpting, UV Editing, etc. |
Navigating the 3D Viewport
|
Action |
Shortcut |
|---|---|
|
Orbit around object |
Middle mouse drag |
|
Pan view |
Shift + middle mouse drag |
|
Zoom |
Mouse wheel or Ctrl + middle mouse drag |
|
Frame selected object |
Numpad |
|
Front / side / top view |
Numpad |
|
Search for any command |
|
|
Undo |
Ctrl + Z (Cmd + Z on Mac) |
|
Save |
Ctrl + S (Cmd + S on Mac) |
For laptops without a middle mouse button, enable Emulate 3 Button Mouse under Edit → Preferences → Input. You can then use Alt + left-drag to orbit.
2. Object Mode versus Edit Mode
This is the most important distinction in Blender.


Object Mode
Select, move, rotate, and scale entire objects.
Edit Mode
Select and change the actual geometry that makes up an object.
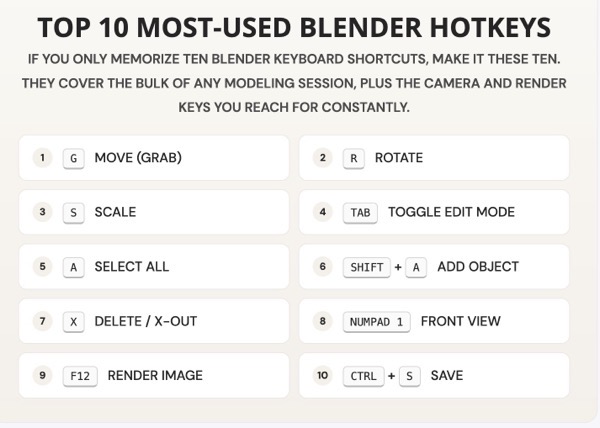
Press Tab to switch between these modes.
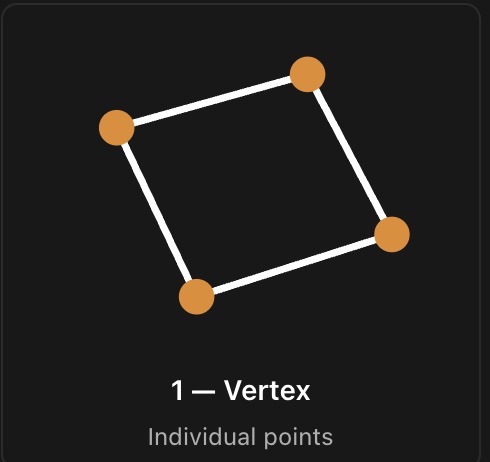
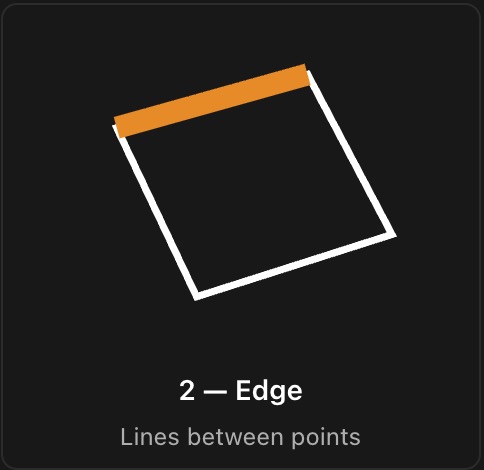
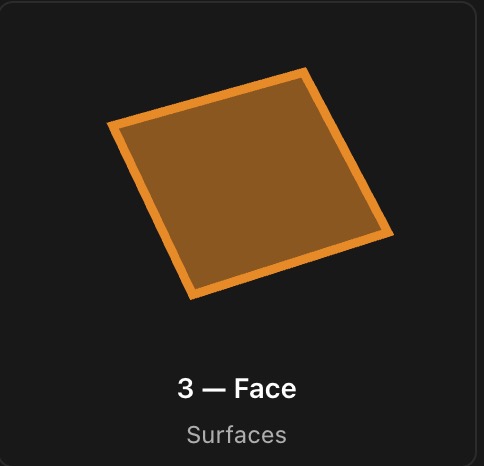
In Edit Mode, you can select three kinds of mesh components:
1 — Vertex
Individual points
2 — Edge
Lines between points
3 — Face
Surfaces
3. Importing a phone scan
-
Export your scan from Polycam or another scanning app. Use FBX if available.
In Blender, choose File → Import and select the appropriate format.
-
Locate and import your file.
-
Select the imported object in the Outliner.
-
Use View → Frame Selected to center it in the Viewport.
If the object is extremely large or small, select it and press S to scale it. Press G to move and R to rotate. Press X, Y, or Zafter a transform shortcut to constrain movement to an axis.
Tip: Save a Blender working copy (.blend) before editing. Keep your original scan unchanged.
4. Cleaning unwanted geometry
Phone scans often contain fragments of the floor, background objects, floating triangles, and distorted surfaces.a
Remove unwanted sections
-
Select the mesh and press
Tabfor Edit Mode. -
Press
3for Face Selection. -
Press
Bfor Box Select, then drag over unwanted geometry. -
Press
X→ Faces to delete it. -
Repeat until the scan is cleaned.
Turn on X-Ray with Alt + Z when you need to select geometry through the object. Without X-Ray, Box Select generally selects only visible geometry.
Select a connected piece of geometry
Hover over a part of the mesh and press L to select the connected geometry under the cursor. This is particularly useful for removing isolated fragments.
Press X → Vertices to delete the selected piece.
Remove loose vertices and edges
In Edit Mode, select everything with A, then press F3 and search for Delete Loose.
This removes disconnected vertices and edges, but does not automatically remove all unwanted floating surfaces.
Merge duplicate vertices
In Edit Mode:
-
Press
Ato select everything. -
Press
M→ By Distance. -
Adjust the merge distance if necessary.
Use a very small distance initially. A large value can collapse details in your scan.
5. Simplifying a dense mesh
Phone scans often have far more polygons than necessary for use in Unity.
The Decimate modifier reduces the number of faces while attempting to preserve the overall shape.
-
Switch to Object Mode.
-
Select your mesh.
-
In the Properties Editor, click the wrench icon (Modifiers).
-
Choose Add Modifier → Generate → Decimate.
-
Use the Collapse method.
-
Adjust the Ratio to reduce polygon count by dragging the slider in the Ratio box.
|
Ratio |
Approximate result |
|---|---|
|
1.0 |
Original mesh |
|
0.5 |
Half the faces |
|
0.25 |
One quarter |
|
0.1 |
One tenth |
Start around 0.5 and reduce gradually. Watch for the loss of recognizable details. Once satisfied, use the modifier menu → Apply if you need to make the change permanent.
Important: Decimation can affect UV mapping and texture appearance. Check the textured model after simplifying.
6. Fixing surface problems
Recalculate normals
If some surfaces appear incorrectly shaded or invisible:
-
Enter Edit Mode.
-
Press
Ato select everything. -
Press
Shift + Nto recalculate normals outside.
This works best with reasonably coherent mesh geometry.
Fill small holes
-
In Edit Mode, switch to Edge Selection (
2). -
Select the boundary edges surrounding a hole.
-
Press
Fto create a face.
This works for simple holes. Large or irregular openings may require more careful modeling.
Smooth the appearance
In Object Mode, right-click the object and choose Shade Smooth.
This changes how the surface is shaded, not the actual mesh geometry. It will not repair a rough or damaged scan.
If you want to use the surface texture from the original scan: Embed the existing texture in the FBX
-
Import your Polycam scan (OBJ, FBX, or another supported format).
-
Switch to Material Preview (the checker-sphere icon at the top right of the 3D Viewport). Confirm the photographic texture appears correctly.
-
Select your mesh.
-
Choose File → Export → FBX (.fbx).
-
In the FBX export settings:
-
Enable Selected Objects if you only want to export the scan.
-
Find Path Mode and change it to
Copy. -
Click the small Embed Textures icon next to Path Mode (the package/box icon).
-
-
Export the FBX. In unity, select the fbx in the ass panel and select extract textures in the properties panel.
7. Exporting to Unity
For your Memory Palace project, I recommend using FBX or GLB.
-
Select the finished object.
-
Choose File → Export → FBX.
-
Enable Selected Objects / Selected Objects Only.
-
Choose a location and export.
-
Import the file into your Unity Assets folder.
8. Quick reference: essential shortcuts
|
Shortcut |
Action |
|---|---|
|
|
Object / Edit Mode |
|
|
Move |
|
|
Rotate |
|
|
Scale |
|
|
Delete menu |
|
|
Select all |
|
|
Deselect all |
|
|
Box Select |
|
|
Select linked geometry under cursor |
|
|
Vertex, Edge, Face selection in Edit Mode |
|
|
X-Ray on/off |
|
|
Recalculate normals in Edit Mode |
|
|
Search for a tool |
|
|
Merge menu in Edit Mode |
|
|
Join selected mesh objects in Object Mode |
The shortcuts above assume Blender’s default keymap and that the mouse is over the 3D Viewport.